Bourbon Glazed Salmon

This bourbon glazed salmon is full of savory sweet flavor. It’s an easy way to get perfectly cooked fish on the table: it cooks in 5 minutes!

Broiled Salmon with Bourbon Glaze

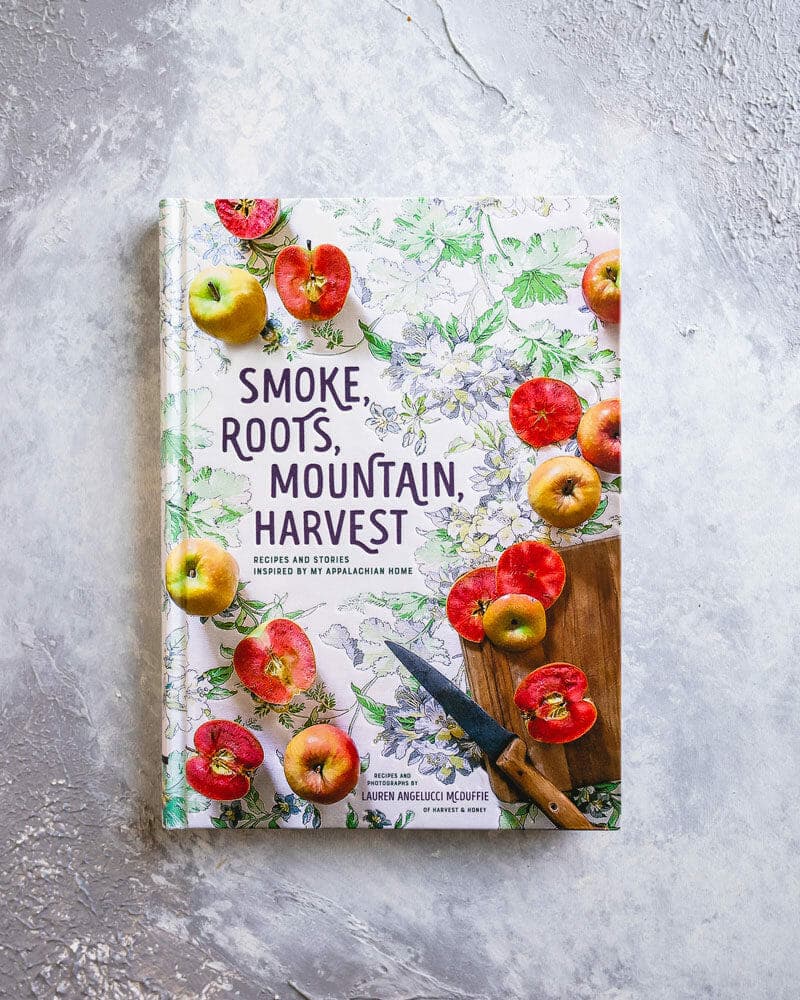
Looking for an easy salmon recipe that’s full of savory sweet flavor? This bourbon glazed salmon is a must try! The recipe is from the cookbook of a dear friend of ours. Our pal Lauren McDuffie of Harvest and Honey wrote the most gorgeous, evocative book Smoke, Roots, Mountain, Harvest, about the Appalachian cuisine of her roots. Man, is this recipe a showstopper! The salmon cooks up in just 5 minutes, and the bourbon sauce? Lauren says it’s like “salmon in a party dress.” After tasting it, we’re inclined to agree! Keep reading for the recipe and a bit more about the book.

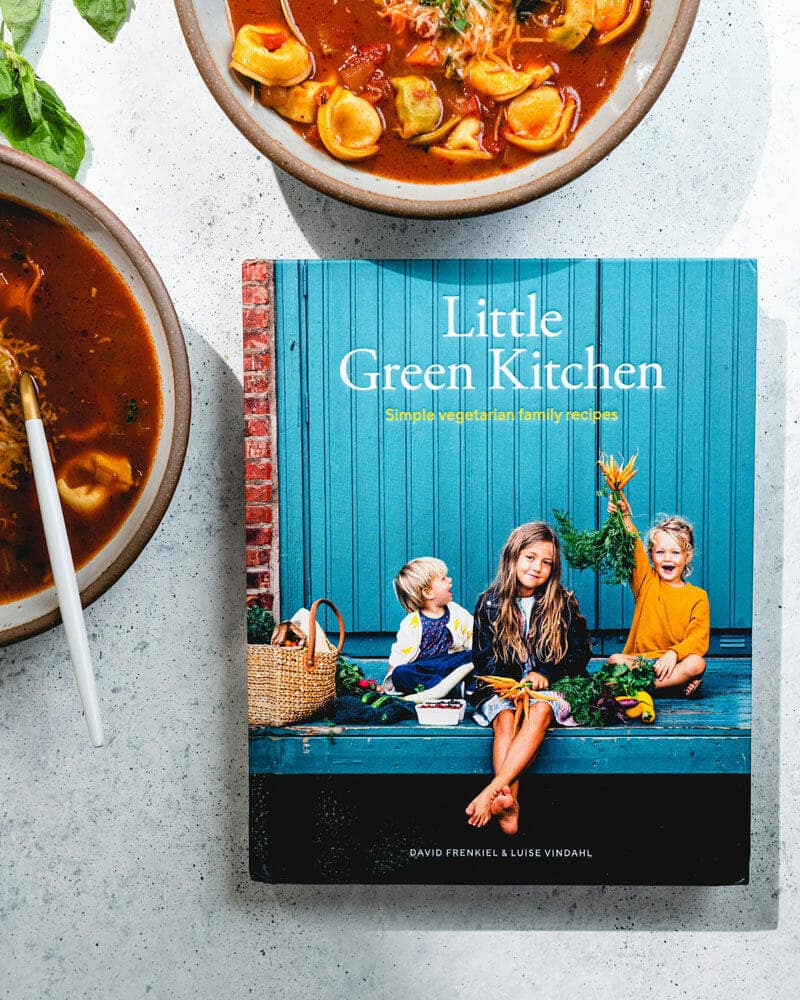
About the book: Smoke, Roots, Mountain, Harvest

Even if we didn’t know Lauren personally, we would gush about her new cookbook. She happens to live right around the corner here in Indianapolis, and we feel spoiled to have another cookbook author in a 5 minute radius! This bourbon glazed salmon salmon recipe is from her book Smoke, Roots, Mountain, Harvest, which she wrote to, in her words, “get a taste of what Appalachian cuisine and culture are all about.”

The book makes you literally want to jump on a plane to get there as fast as you can! Lauren guides you through Appalachian favorites like Sorghum Cider Quick Bread, Blackberry Buckle, and Pimento Cheese. At the same time, she shares stories and anecdotes that make it read like a novel. It’s truly unique, and we are just over the moon excited for Lauren’s book to be out in the world.

Get the book: Smoke, Roots, Mountain, Harvest

Bourbon glazed

How to broil salmon

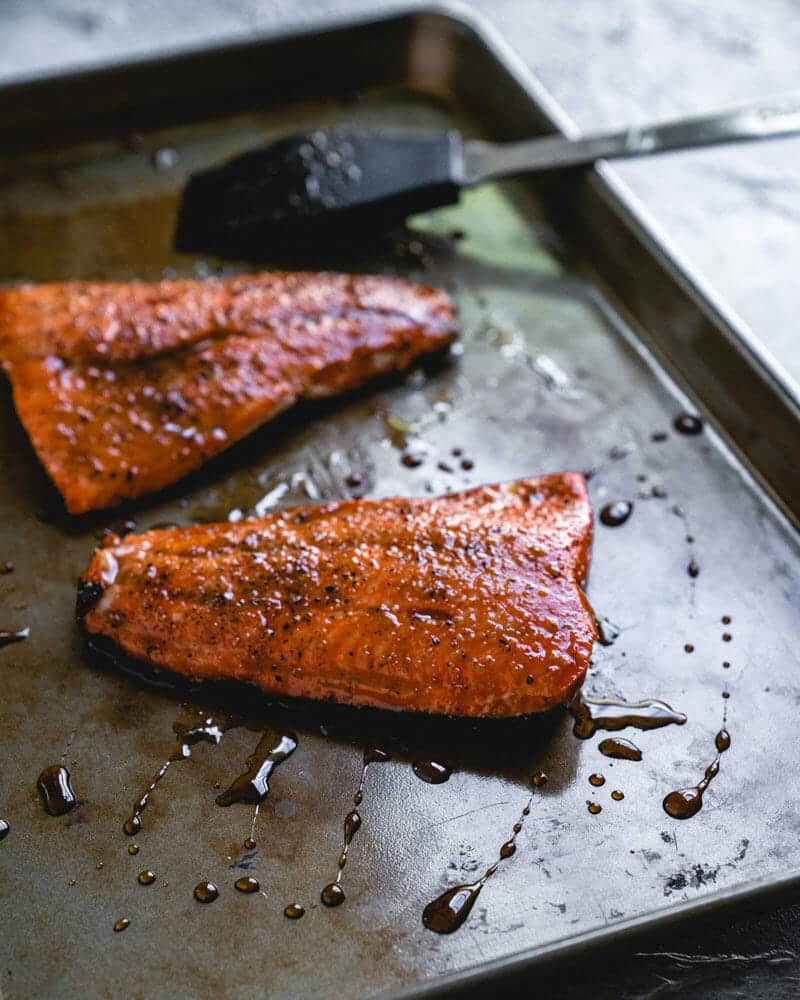
Making this bourbon glazed salmon could not be easier! You can use salmon fillets with the skin on or skin off. Place the salmon on a baking sheet, and liberally add salt and pepper. Then pop it in the broiler and broil for 5 minutes. That’s it! A seriously easy salmon recipe. You’ll make a homemade bourbon glaze for the salmon: paint the glaze on in the last minute of broiling, then again right when you remove it from the oven.

Another great way to cook salmon? Try our Oven Baked Salmon. Or see all our salmon recipes!

How to broil salmon

Making the glaze for bourbon glazed salmon

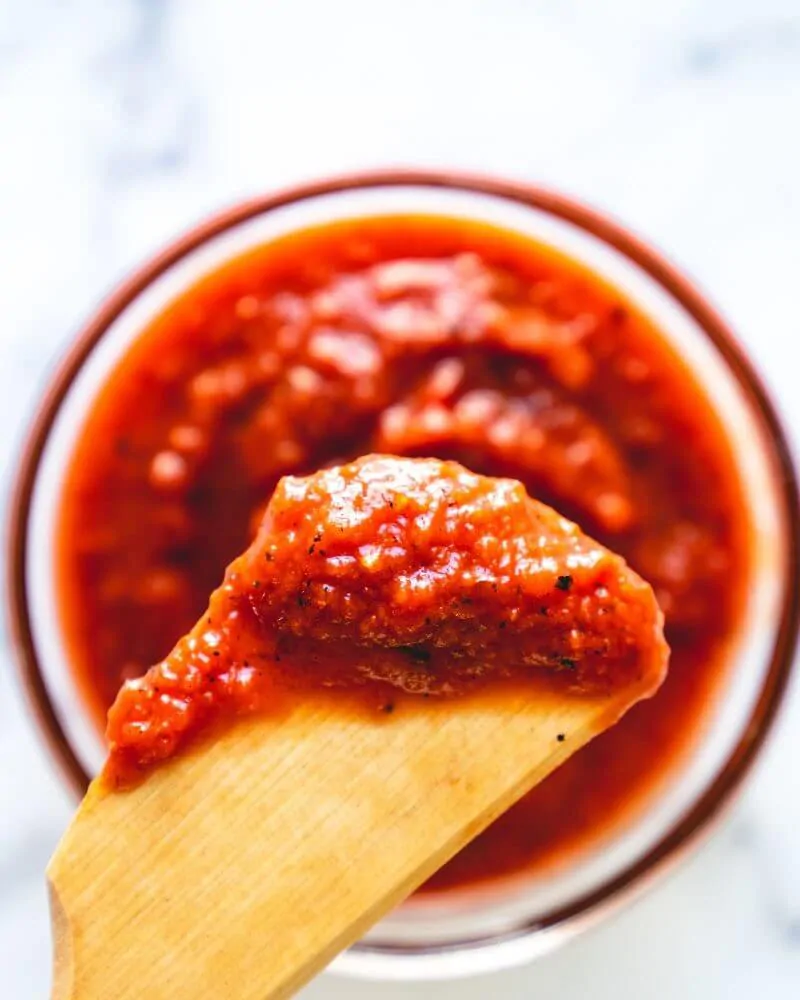
The bourbon glaze is what takes this salmon from ordinary to extraordinary! Here are a few notes about the glaze:

  • Simmer for 15 minutes, then cool for 20. The main idea for the bourbon glaze is you’ll simmer bourbon with brown sugar and some other seasonings until it reduces down into a syrupy glaze. The cooking part takes only about 15 minutes, but the glaze does need to cool for about 20 minutes to thicken up.
  • Make it in advance for a quick meal. To short cut this timing, you can make the bourbon glaze in advance for a truly quick meal! Just store it refrigerated and bring it to room temperature before to serving. It truly adds this sweet-salty-savory component to the salmon that will blow your mind. Trust us!

How to serve it!

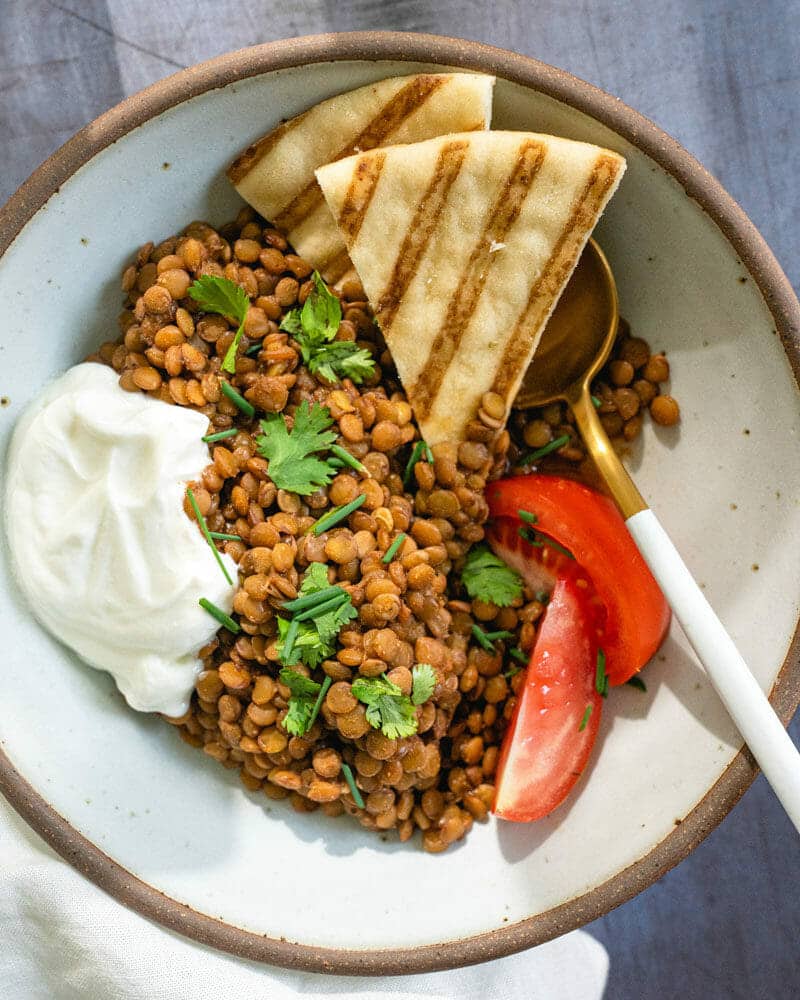
Serve this salmon with one of our go-to salmon sides. Here are a few ideas:

  • Potato wedges: Baked Potato Wedges or Parmesan Potato Wedges would make a truly delightful meal.
  • Salad: Perfect Caesar Salad, Spinach Apple Salad or Easy Arugula Salad are a perfect match.
  • Roasted or steamed veggies: Roasted Asparagus with Lemon or Lemony Steamed Green Beans make a fantastic meal.

On buying sustainable seafood

Finally, a few notes on how to buy sustainable fish for this bourbon glazed salmon! Alex and I try to buy sustainable seafood where possible. We eat a mostly plant-based diet, but flex occasionally to eat sustainable fish. Here’s what we’ve learned about how to buy sustainable seafood:

  • Always always buy wild salmon. Farmed salmon is usually marketed as sustainable fish; however, the fish are fed other wild forage fish, which are not sustainable seafood.
  • Frozen is good too! A myth about fish is that “fresh is best.” As soon as an animal dies it begins to decompose; freezing suspends this process. If a fish is frozen when it was caught and stays frozen until it gets to your kitchen, it will be higher quality than a raw fish that has taken a week to get to your plate.
Broiled salmon

This bourbon glazed salmon recipe is…

Pescatarian and gluten-free.

Easy Bourbon Glazed Salmon


1 Star2 Stars3 Stars4 Stars5 Stars (45 votes, average: 4.07 out of 5)


  • Prep Time: 10 minutes
  • Cook Time: 20 minutes
  • Yield: 4 1x
Print Recipe
Pin Recipe

Description

This bourbon glazed salmon is full of savory sweet flavor. It’s an easy way to get perfectly cooked fish on the table: it cooks in 5 minutes!


Scale

Ingredients

For the bourbon glaze

  • 3/4 cup bourbon
  • 2/3 cup brown sugar
  • 1 tablespoon Worcestershire sauce
  • 1 tablespoon honey
  • 1 tablespoon Dijon mustard
  • 1 teaspoon apple cider vinegar
  • 1/2 teaspoon  garlic powder
  • 1 teaspoon kosher salt

For the bourbon salmon

  • Four 4– to 5-ounce salmon fillets (skin on or off)
  • Kosher salt
  • Freshly ground pepper

Instructions

  1. For the bourbon glaze: In a small saucepan over medium heat, combine the bourbon, brown sugar, Worcestershire sauce, honey, Dijon mustard, vinegar, garlic powder, and 1 teaspoon kosher salt. Simmer the mixture, stirring frequently until the sugar has dissolved. Continue to gently simmer the glaze, without stirring, until it has reduced by half, 12 to 15 minutes. Cool for at least 15 minutes before using, to give it a chance to thicken up.
  2. For the salmon: Position a rack in the upper third of the oven and preheat the broiler. Line a baking sheet with parchment paper. Season the flesh side of each fish fillet with 1/2 teaspoon salt and 1/2 teaspoon pepper (or if they don’t have skin, sprinkle 1/4 teaspoon salt and 1/4 teaspoon pepper on each side). Place them, skin-side down, side by side on the baking sheet. Broil for 4 minutes. Remove the salmon from the oven and, using a pastry brush, brush liberally with some of the bourbon sauce. Return the baking sheet to the broiler for 1 minute. Or, if you fillets are particularly thick, check for doneness, and if necessary, go a little longer.
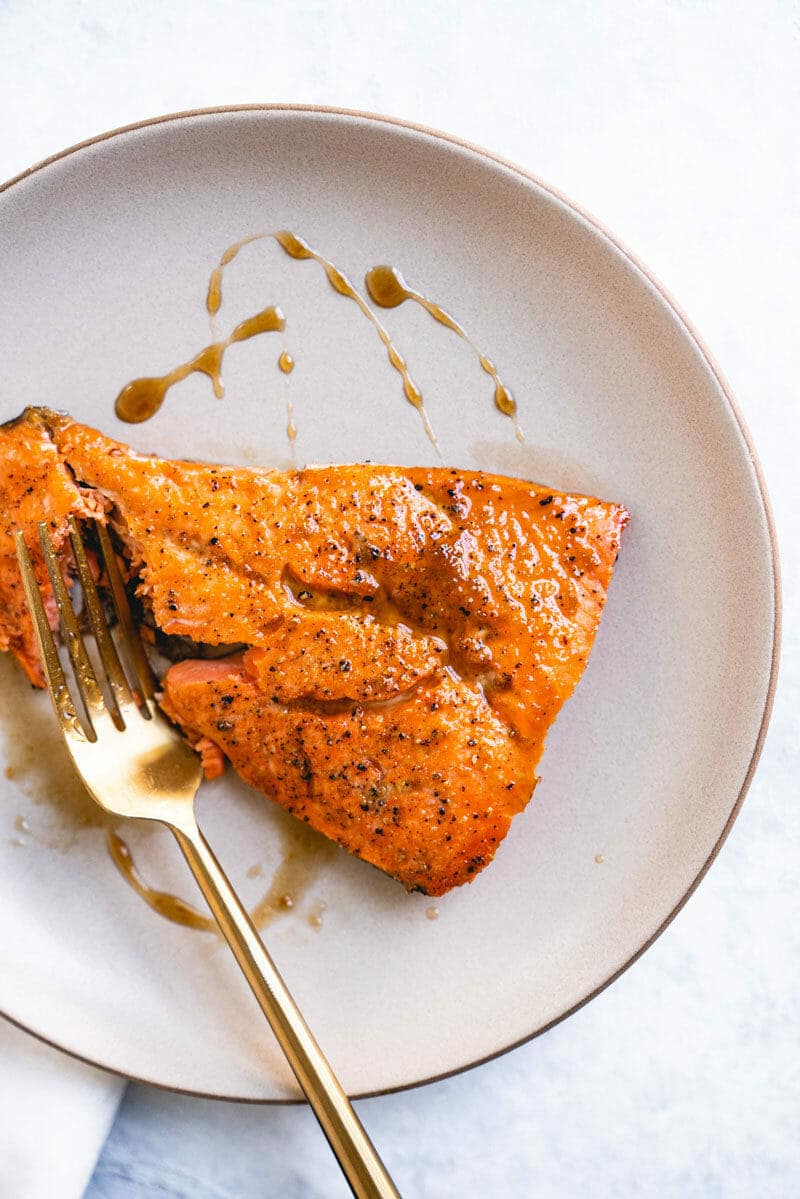
  3. Brush the fillets again with the bourbon sauce and transfer to a platter. Pour the extra sauce into a serving dish, and serve alongside the salmon for drizzling and dipping. (If you brush the sauce on too soon, the sugars in the glaze could burn, so doing it toward the end of cooking and then once more when the fish is out of the oven works out perfectly.)

You can read Full Here: https://www.acouplecooks.com/broiled-salmon-with-bourbon-glaze/

How to Cook Lentils

Wondering how to cook lentils? Here’s our tried and true stovetop method, whether you want them straight up or seasoned for a fast dinner!

How to cook lentils

Looking to eat more lentils? Lentils are a total powerhouse: they’re full of plant-based protein, low in calories, have a host of health benefits, and are super affordable. And, they’re seriously tasty when prepared correctly! When Alex and I started eating a mostly plant based diet over 10 years ago, we kept hearing, “Eat more lentils!” It took a while to figure out the best ways to eat them, but now we’re pros ant incorporating them in meals. This recipe is a basic lentil recipe that can be served many different ways: as part of a bowl meal, in a taco, and more! Even better: our two-year-old Larson adores them. Keep reading for how to cook lentils: of the brown or green variety!

Related: Instant Pot Lentils & Rice

How to cook lentils

How to cook lentils

Ready to get started? This recipe for how to cook lentils uses green or brown lentils. This is the most basic type of lentils and is easy to find at the grocery store. There are quite a few other types of lentils — see the Types of lentils section below for more info!

Now, this method for how to cook dried lentils is designed to work either as a component in another recipe, or seasoned to eat as a quick lunch or dinner recipe! If you want to make the lentils to go in another recipe, you can skip all the seasonings and just cook them in either vegetable broth or water. Cooking lentils in vegetable broth adds a ton of flavor, but if you don’t have it you can absolutely use water.

Here are the ingredients you need for how to make lentils on the stovetop:

  • Brown or green lentils (either will work)
  • Vegetable broth (you can sub water in a pinch, but veggie broth adds great flavor)
  • Onion powder
  • Paprika
  • Garlic powder
  • Oregano
  • Salt & pepper

Simply place all the ingredients into a pan, bring to a brisk simmer, and simmer for about 20 to 30 minutes until the lentils are tender but still hold their shape. This recipe is seriously simple: and if you want an even simpler version, try our Instant Pot Lentils! It’s the same recipe but takes about 15 minutes total using a pressure cooker.

How to cook lentils
Serve ’em up with Greek yogurt, cilantro, & tomato wedges for a quick lunch

How to serve these lentils

If you’re using these lentils as a quick lunch or easy dinner recipe, here are some great ideas for how to use them:

  • As a bowl meal (pictured): Throw them in a bowl with pita bread, a dollop of Greek yogurt, tomato wedges, and chopped cilantro
  • In a taco: Throw them into a tortilla with salsa and sour cream: or try them in place of the filling in one of our taco recipes
  • With eggs: This morning Alex and Larson ate a delicious brunch of scrambled eggs and lentils! Here’s our Best Scrambled Eggs recipe.

Types of lentils

Before we start with How to cook lentils, a quick primer on lentil types. All lentils are not created equal! Here are a few of the most popular types of lentils:

  • Brown & green lentils: These are the most “standard” varieties when you think of lentils — and the type featured in the recipe below! They cook quickly (in 20 to 30 minutes), and tend to fall apart when cooked instead of hold their shape. Try them: Quick Lentil Curry, Vegan Sloppy Joes, or Lentil Tacos.
  • Red lentils: These bright orange colored lentils take about 20 minutes to cook and break down easily into a “mush”. Try them: Masoor Dal or Red Lentil Soup
  • French lentils (Puy lentils): These lentils hold their shape when cooked, making them very different from brown, green and red lentils. They’re small and greenish-gray. Try them: Easy French Lentils, Vegetarian Shepherd’s Pie or French Lentil Salad.
  • Black lentils (Beluga lentils): Black lentils are the most flavorful around. They’re very small and dark, and similar to French lentils. They hold their shape when cooked which works for salads, but if you cook longer they’ll also fall apart like in curries. Try them: Seasoned Black Lentils, Lentil Salad, Sweet Potatoes with Goat Cheese & Lentils or Dal Makhani

Lentils nutrition facts

Lentils are protein packed and a healthy vegetable choice for any meal. Here are a few of lentils nutrition facts: 1/2 cup cooked (1/4 cup dry) lentils has:

  • 12 grams protein
  • 169 calories
  • 5 grams fiber
  • 0.5 grams fat
  • 30 grams carbohydrates

Harvard shows that legumes have lots of additional health benefits. Scientific studies have linked a diet high in legumes with a lower risk of developing diabetes, obesity, high blood pressure, heart disease, high cholesterol, and strokes.

Legumes are a plant based protein

Lentil Q&A

And before we get to how to cook lentils: all your lentil questions answered! If you have a question that’s not included, let us know in the comments below and we’ll add it.

How to cook dried lentils?

See the recipe below!

Are lentils beans?

Lentils and beans are both legumes. Bean can be used as a synonym for legume, so lentils are technically part of the bean family. But in common usage, beans are larger and rounder, whereas lentils are lens shaped.

What are some lentils benefits? Are lentils good for you?

According to Harvard, scientific studies have linked a diet high in legumes with a lower risk of developing obesity, diabetes, high blood pressure, high cholesterol, heart disease, or strokes. So yes, lentils are a great choice for a healthy diet.

Are lentils gluten free?

Yes, lentils contain no gluten.

How long to cook lentils?

It depends on the type of lentil and what you’ll be using them for. For brown and green lentils, cook them 20 to 30 minutes until tender. The recipe below cooks them until they just hold their shape: other recipes like soups or curries cook them longer.

Are lentils legumes?

Yes, lentils are legumes! Legumes include lentils, beans, peas, chickpeas, and peanuts.

Are lentils keto?

Lentils have a high amount of carbs, so they are not included in a keto diet.

Can dogs eat lentils?

Yes, dogs can eat lentils. Start with a small amount and if your dog reacts adversely, do not continue to feed them lentils.

What do lentils taste like?

It depends on the type of lentil and how you’re serving them! But in general, brown lentils taste earthy, green lentils taste peppery, and red lentils taste sweet.

How much protein in lentils?

Lentils are protein packed! A 1/4 cup dry (1/2 cup cooked) brown or green lentils has 12 grams protein.

How to season lentils?

You can season lentils any way you’d like! In the recipe below we’ve used onion powder, garlic powder, paprika, oregano, salt and pepper. Or, try them in our Quick Lentil Curry, Masoor Dal or Verde Lentil Tacos.

Are lentils vegetables?

Lentils are vegetables! They are a fantastic plant based protein for vegetarian and vegan diets.

How long to soak lentils?

This depends on the recipe! Most of the lentil recipes on this website do not require soaking.

Do lentils go bad?

Dry lentils last for 2 to 3 years at room temperature, stored in a sealed container. Cooked lentils last in the refrigerator for up to 1 week.

Vegan taco recipe
Throw these lentils into a taco with salsa & your favorite fillings

Lentil recipes

Outside of this recipe for how to cook lentils, here are some more lentil recipes using all types of lentils: green, brown, red, French and black! The method for cooking each type is different.

  • 15 Best Lentil Recipes
  • Quick Coconut Lentil Curry
  • Masoor Dal (Indian Red Lentils)
  • Butternut Squash Lentil Soup with Kale
  • Instant Pot Lentil Tacos
  • Smoky Instant Pot Lentils and Rice
  • “Verde” Lentil Vegan Tacos
  • Healthy Baked Sweet Potato with Moroccan Lentils
  • Sweet Potatoes with Goat Cheese & Lentils
  • Rice & Lentil Salad
  • Vegetarian Shepherd’s Pie with French Lentils
  • Hearty Vegan Stew with Sprouted Lentils
  • Red Lentil Curry with Rice (Mesir Wat)
  • Tuscan Artichoke Lentil Stew
  • Creamy Red Lentil Soup
  • Vegetarian Lentil Tacos
  • Lentil to Water Ratio
  • What are Lentils?

This recipe is…

Vegetarian, vegan, plant-based, dairy-free, and gluten-free.

Lentils nutrition

How to Cook Lentils


1 Star2 Stars3 Stars4 Stars5 Stars (46 votes, average: 4.20 out of 5)


  • Prep Time: 5 minutes
  • Cook Time: 20 minutes
  • Yield: 4 (about 4 cups) 1x
Print Recipe
Pin Recipe

Description

Wondering how to cook lentils? Here’s our tried and true stovetop method, whether you want them straight up or seasoned for a fast dinner!


Scale

Ingredients

  • 4 cups vegetable broth (or water, or a combination of both)
  • 1 1/2 cups brown or green lentils
  • 1 1/2 teaspoons onion powder
  • 1 1/2 teaspoons paprika
  • 1 teaspoon oregano
  • 1/2 teaspoon garlic powder
  • 1/2 teaspoon black pepper
  • 3/4 teaspoon kosher salt

Instructions

  1. Place all ingredients in a large saucepan. (If you’re planning to cook them without seasoning to use in a separate recipe, omit the spices, salt, and pepper.)
  2. Bring to a rapid simmer, then reduce the heat and simmer for about 20 to 25 minutes until the lentils are tender but still hold their shape. There will be some leftover broth but the lentils will soak it up as they sit and become perfectly moist. Taste and add another pinch of salt if you’d like. Serve warm. (Storage info: Leftovers can be stored in the refrigerator; reheat on the stovetop.)

You can read Full Here: https://www.acouplecooks.com/how-to-cook-lentils/

How to Cook Shrimp on the Stove

Wondering how to cook shrimp? Here’s a quick tutorial on how to saute shrimp on the stove: and it takes only 4 minutes to cook!

How to cook shrimp

Are you a shrimp fan? Alex and I eat a mostly plant based diet, but we occasionally eat some seafood as well. And one of our very favorite choices of seafood is shrimp: for obvious reasons. There are endless ways to eat it (tacos, grilled skewers, with couscous), and the quick cooking time makes it perfect for weeknight meals. Cooking time 2 to 4 minutes? Yes, please! Easily the quickest way to cook shrimp is on the stove: it couldn’t be simpler. Here’s how to cook shrimp: our simple stove method, and a few other ways we like to eat it.

Related: Broiled Salmon with Bourbon Glaze

How to cook shrimp

How to cook shrimp

Cooking shrimp on the stove is one of the easiest ways to prepare it! You can cook shrimp on the stove peeled or unpeeled, whatever your preference! If you’re using frozen shrimp, make sure it’s fully thawed (see below). For this method, we’ve used a simple blend of seasonings: minced fresh garlic and butter. It’s simple, classic, and hits the mark every time.

Here’s how to cook shrimp on the stove:

  1. If using frozen shrimp, thaw it completely.
  2. Pat the shrimp dry and mix it with minced garlic and salt.
  3. In a large skillet, melt a few tablespoons butter. Add the shrimp and cook for 1 to 2 minutes per side, until opaque and cooked through, turning with tongs.
  4. Spritz with fresh lemon or lime juice (optional). Serve immediately!

Scroll down for the full recipe!

Saute pan

How to thaw frozen shrimp

How to thaw frozen shrimp? There are a few different options: if you think ahead, simply place the frozen shrimp in the refrigerator overnight.

If you’re using them the day of (which is what we normally do!), place the frozen shrimp into a large bowl with very cold water. Stir the bowl every 5 minutes to break up clumps of shrimp that freeze together. The shrimp should be defrosted in about 15 minutes.

How to cook shrimp

How to buy sustainable shrimp

Finally, a little note on how to buy sustainable shrimp. Alex and I try to buy sustainable seafood where possible. In researching how to buy sustainable seafood, Alex and I have learned to look for wild-caught fish if possible. Also if you live in the US, look for US caught if you can. 90% of the seafood we eat in the US is imported. Imported seafood runs the risk of being overfished, caught under unfair labor practices, or farmed in environmentally harmful ways.

Also, how your fish is caught matters. Look for hook and line as one example of a sustainable gear type. Bottom trawling is considered the most destructive and least sustainable method.

Fresh vs. frozen shrimp: which is better?

If you’re wondering about fresh vs. frozen shrimp, frozen is okay too! A myth about fish is that “fresh is best.” As soon as an animal dies it begins to decompose; freezing suspends this process. If a fish is frozen when it was caught and stays frozen until it gets to your kitchen, it will be higher quality than a raw fish that has taken a week to get to your plate.

Seafood tacos

How to serve sauteed shrimp

Once you’ve made the recipe below and cooked your shrimp on the stovetop, how to serve it? There are a multitude of ways to serve shrimp; here are some of our favorite ways to accessorize this recipe:

  • Shrimp Tacos: Toss them in a tortilla with cabbage, red onion, fresh lime juice, and our shrimp taco sauce
  • Over Polenta: Serve them over creamy polenta for a make-shift shrimp and grits (or for dairy-free, use vegan polenta).
  • On a Salad: Throw them on a salad to make a main dish salad bowl meal, like Shrimp Cobb Salad or Tropical Shrimp Salad.
  • With Broccoli: Try this Best Steamed Broccoli, bright green, crisp tender and served with feta cheese (or try it in the Instant Pot).

And that’s it: how to cook shrimp!

Scroll down to our recipe for the exact steps on how to cook shrimp on the stove!

And looking for more ways to cook shrimp? Scroll down to below the recipe for a list of our favorite ways.

This recipe is…

Pescatarian and gluten free. For dairy free, use olive oil.

How to Cook Shrimp on the Stove


1 Star2 Stars3 Stars4 Stars5 Stars (33 votes, average: 4.42 out of 5)


  • Prep Time: 3 minutes
  • Cook Time: 5 minutes
  • Yield: 4 to 6 1x
Print Recipe
Pin Recipe

Description

Wondering how to cook shrimp? Here’s a quick tutorial on how to saute shrimp on the stove: and it takes only 4 minutes to cook!


Scale

Ingredients

  • 1 pound large shrimp, deveined (peeled or unpeeled)
  • 3 garlic cloves
  • 1/2 teaspoon kosher salt
  • 3 tablespoons butter or olive oil
  • 2 lemon wedges (or lime)
  • Torn cilantro or parsley, for garnish

Instructions

  1. Thaw the shrimp (see the notes above).
  2. Mince the garlic.
  3. Pat the shrimp dry. In a medium bowl, mix the shrimp with the garlic and salt.
  4. In a large skillet, heat the butter or olive oil on medium high heat. Cook the shrimp for 1 to 2 minutes per side until opaque and cooked through, turning them with tongs.
  5. Spritz with juice of the lemon wedges and serve immediately.

You can read Full Here: https://www.acouplecooks.com/how-to-cook-shrimp-on-the-stove/

Pizza Marinara

Pizza marinara is classic Neapolitan pizza. There’s no cheese, so it’s all about the tomatoes, garnished simply with garlic and oregano. Buon appetito!

Pizza marinara

Alex and I journeyed hours to get to Naples, Italy, the birthplace of pizza. And our pilgrimage ended at one place: Da Michaele, the famous generations-old pizzeria. The green and white tiled wood-fired oven, the tangy tomato sauce, and the doughy crust: it is all precisely authentic. They serve only two flavors, the most classic of all Neapolitan pizza: Pizza Margherita (mozzarella, tomatoes and basil) and Pizza Marinara (tomato only — no cheese!). And my, oh my, was it epic. Want to make classic pizza marinara at home? Here’s our recipe: and we think it’s pretty darn perfect.

Related: Looking marinara-style sauce to put on pizza? Go to Easy Pizza Sauce.

Pizza marinara

What is pizza marinara?

Pizza marinara is the simplest of classic Neapolitan pizza: that is, pizza in the style that originates from Naples, Italy. This pizza has simple toppings, a dough that’s thin in the middle and poofed on the outside, usually baked in a wood-fired oven at super high temperatures. Pizza marinara has no cheese: just tomato sauce, thinly sliced garlic, and oregano. It’s similar to pizza margherita, but without the cheese. Some sources state pizza marinara originated as early as the mid 1700’s in Naples.

As you can imagine, with only a handful of ingredients, the flavor of pizza marinara depends on the quality of the ingredients. Here’s a bit more on how to make pizza marinara that’s seriously classico.

Want Neapolitan pizza with cheese? Here’s our master recipe for perfect Neapolitan pizza.

Pizza sauce

For the tomatoes

The quality of the tomatoes in a pizza marinara is paramount. In Italy, the variety of tomatoes that are used for Neapolitan pizza are called San Marzano tomatoes. San Marzano tomatoes are grown all over Italy and have a beautifully sweet flavor. They’re becoming more popular here in the US and are available under many different brands.

Now, we are pizza purists over here. We used to only use canned San Marzano tomatoes in our pizzas. However, we’ve found a type that has a flavor even closer to what we remember from Naples: fire roasted tomatoes! You know how sometimes if you taste a bite of tomatoes straight from the can and it tastes bitter? Fire roasted tomatoes come out of the can with a sweet flavor: and no bitterness at all. Canned fire roasted tomatoes are available at many mainstream grocery stores and also online.

This pizza marinara uses our “famous” easy pizza sauce that takes only 5 minutes to make in a blender. All you need is fire roasted tomatoes, garlic, olive oil, dried oregano and salt. It’s so simple that we have it memorized. And you will be absolutely amazed when you take a taste out of the blender. We promise!

How to make pizza dough

For the dough

Alex and I have spent 10 years researching our pizza dough recipes. They’ve been through many revisions until we tweaked to the absolute perfect dough. You can use either of the two pizza dough recipes for your pizza marinara (and of course, you can shortcut by using store-bought dough):

  • Best Pizza Dough This is our standard pizza dough that comes out perfect. We make it using stand mixer, but you can also knead it by hand.
  • Easy Thin Crust is similar but makes a thinner dough that you roll out — it would also work well here!
Pizza marinara

For the pizza stone

In order to make the most authentic pizza marinara, you’ll need a pizza stone for baking it. Why? Well, classic Neapolitan pizza ovens reach up to 1000 degrees Fahrenheit and cook the pizzas in just a minute or two. Your standard oven can only get up to 500 degrees max (unless you want to get a pizza oven…see below!). So the pizza stone helps to get heat under the pizza itself; it makes it crispy on the bottom but soft on the inside.

Now, if you use a pizza stone…you’ll need a pizza peel too! Keep reading for our recommendations:

  • Pizza stone: Here’s the best pizza stone we’ve found. And for reference, here’s a bit more on pizza stone care.
  • Pizza peel: What’s a pizza peel? It’s a paddle used to slide the pizza onto the hot pizza stone in the oven. We recommend this Standard pizza peel or this Conveyor pizza peel.
Pizza marinara

What about a pizza oven?

A pizza oven is not necessary for making homemade pizza marinara. But if you want to step up your pizza game, traditional artisan pizza is cooked at temperatures way hotter than your standard oven can achieve. We’ve found a relatively inexpensive pizza oven that heats to 1000 degrees Fahrenheit in just 10 minutes! Here’s the oven we use, the Ooni pizza oven, and why we think it’s the best pizza oven out there.

Ready to make pizza marinara?

Well, that’s all you need to know to make a classic Neapolitan pizza marinara! Top the crust with the pizza sauce, a sprinkle of sliced garlic, and fresh oregano. We like to serve ours with a drizzle of olive oil to get just the right moistness when serving. Let us know if you try it in the comments below!

Pizza Marinara


1 Star2 Stars3 Stars4 Stars5 Stars (13 votes, average: 4.69 out of 5)


  • Prep Time: 1 hour
  • Cook Time: 10 minutes
  • Yield: 8 slices 1x
Print Recipe
Pin Recipe

Description

Pizza marinara is classic Neapolitan pizza. There’s no cheese, so it’s all about the tomatoes, garnished simply with garlic and oregano. Buon appetito!


Scale

Ingredients

  • 1 ball Best Pizza Dough (or Food Processor Dough or Thin Crust Dough)
  • 1/2 cup Easy Pizza Sauce
  • 1 garlic clove
  • 1 handful fresh oregano
  • Semolina flour or cornmeal, for dusting the pizza peel
  • Kosher salt
  • Extra virgin olive oil, for drizzling

Instructions

  1. Make the pizza dough: Follow the Best Pizza Dough recipe to prepare the dough. (This takes about 15 minutes to make and 45 minutes to rest.)
  2. Place a pizza stone in the oven and preheat to 500°F. OR preheat your pizza oven (here’s the pizza oven we use).
  3. Make the pizza sauce: Make the Easy Pizza Sauce.
  4. Prepare the toppings: Thinly slice the garlic clove. Chop the oregano leaves.
  5. Bake the pizza: When the oven is ready, dust a pizza peel with cornmeal or semolina flour. (If you don’t have a pizza peel, you can use a rimless baking sheet or the back of a rimmed baking sheet. But a pizza peel is well worth the investment!) Stretch the dough into a circle; see How to Stretch Pizza Dough for instructions. Then gently place the dough onto the pizza peel.
  6. Spread the pizza sauce over the dough using the back of a spoon to create a thin layer. Top with thinly sliced garlic.
  7. Use the pizza peel to carefully transfer the pizza onto the preheated pizza stone. Bake the pizza until the cheese and crust are nicely browned, about 5 to 7 minutes in the oven (or 1 minute in a pizza oven).
  8. Remove from the oven. Garnish with a drizzle of olive oil, a few pinches of kosher salt, and the fresh oreagno. Slice into pieces and serve immediately.

You can read Full Here: https://www.acouplecooks.com/pizza-marinara/

Easy Instant Pot Refried Beans

These Instant Pot refried beans are easy to make from dried beans, without hours of soaking! They taste just like restaurant style: and they’re healthy too.

Instant Pot Refried Beans

Do you make your own refried beans? Alex and I buy canned for a quick fix, but we’ve also started making our own at home. Homemade refried beans taste so seriously good, it’s worth making them when you have the time! The Instant Pot is actually perfect for homemade refried beans, because it skips the soaking time! Just throw the beans in with some seasoning, and in 1 hour they come out perfectly tender. Here’s how to make Instant Pot refried beans.

Refried Beans made in a pressure cooker

How to make Instant Pot refried beans

Homemade refried beans taste so much better than canned! They can also be healthier than many canned versions. Many canned versions use lard, but this Instant Pot refried beans recipe has a healthy spin. It uses only 2 tablespoons of butter or olive oil for an equivalent of two cans of beans. It results in beans that are so full of flavor, you’ll find yourself buying bags and bags of canned pinto beans!

The great thing about the Instant Pot is that there’s no soak time. Many methods for cooking dried beans call for soaking them overnight. The you’ll need to check the pot quite a bit to taste and see if the beans are done. But the pressure cooker method, it’s almost totally hands off! Here’s how to make Instant Pot refried beans:

  1. In the Instant Pot, place finely chopped onion, garlic, and jalapeño pepper. Add cumin, chili powder, smoked paprika, water, and dried pinto beans.
  2. Pressure cook on high for 60 minutes.
  3. Quick release.
  4. In a large saucepan or skillet, melt butter or olive oil. Add the cooked beans and cook until thickened, then mash them down with a spoon or potato masher until the desired texture is reached.
Beans in Instant Pot

What type of beans for refried beans?

This Instant Pot refried beans recipe uses dried pinto beans, which is commonly used for refried beans in the US. As we shopped for this recipe, Alex and I found a lot of variation in the dry beans labeled as “pinto beans.” There are lots of different varieties, with a range of colors. Feel free to use any type of pinto bean you like!

You can also make refried beans using black beans. Feel free to use black beans in this recipe: just taste when finished and if the beans aren’t tender, pressure cook a few more minutes. Or, use canned: follow our Refried Black Beans recipe to make a quick and simple version.

What makes this a healthy spin on refried beans?

Refried beans can have quite a bit of added fat, and usually it’s lard. These Instant Pot refried beans are incredibly delicious without a lot of added fat. There’s just 2 tablespoons butter or olive oil added to 3 cups beans (equivalent of 2 15-ounce cans). Adding butter makes for a creamier overall consistency, so we’d recommend if you eat dairy. For a fully plant-based recipe, olive oil works too.

How to add flavor but still keep the recipe healthy? Onion, garlic, jalapeño, and spices! These ingredients are low calorie, but big on flavor. The cumin and smoked paprika add complexity and depth that make these beans seriously satisfying.

Bean dip
Try them in our easy Refried Bean Dip

How to serve these Instant Pot refried beans

If you need some suggestions, we’re here to help! Alex and I recently served these refried beans as a side to go with tacos on the patio, and they were superb. Here are a few more suggestions:

  • As a dip: Try them in our Refried Bean Dip with chips. And frozen margaritas!
  • In tacos: They’d be great in our Refried Bean Tacos or Crispy Cauliflower Tacos.
  • As a side: Serve alongside Artichoke Vegetarian Enchiladas or Grilled Shrimp.

What’s an Instant Pot? Which do you recommend?

An Instant Pot is a programmable digital pressure cooker (Instant Pot is the brand name; Instapot is a slang variation). Here’s the 6 quart Instant Pot that we use: we’d highly recommend it! There are many other fantastic brands of electric pressure cookers. The concept is to cook foods at high pressure, which cuts down on cooking time (versus a crock pot or slow cooker, which is the opposite). If you need more inspiration, here are all our Healthy Instant Pot Recipes!

Instant pot refried beans

This Instant Pot refried beans recipe is…

Vegetarian, gluten-free, vegan, plant-based, and dairy-free (using the olive oil option).

Easy Instant Pot Refried Beans


1 Star2 Stars3 Stars4 Stars5 Stars (23 votes, average: 4.30 out of 5)


  • Prep Time: 15 minutes
  • Cook Time: 1 hour
  • Yield: About 3 cups 1x
Print Recipe
Pin Recipe

Description

These Instant Pot refried beans are easy to make from dried beans, without hours of soaking! They taste just like restaurant style: and they’re healthy too.


Scale

Ingredients

  • 1/2 cup finely chopped yellow onion
  • 3 garlic cloves
  • 1 jalapeño pepper
  • 1 tablespoon cumin
  • 1 teaspoon chili powder
  • 1 teaspoon smoked paprika
  • 1 1/2 cups dried pinto beans
  • 3 cups water
  • 1 teaspoon kosher salt
  • 2 tablespoons butter (or olive oil for vegan)

Instructions

  1. Finely chop the onion. Mince the garlic. Remove the pith and seeds from the jalapeño pepper, then finely chop it.
  2. In the Instant Pot, place the onion, garlic, jalapeño pepper, cumin, chili powder, pinto beans, water and kosher salt, and give them a stir. Lock the lid and place the vent in the “Sealing” position.
  3. Cook on high pressure for 60 minutes: Press the Pressure Cook button (making sure the “High Pressure” setting is selected) and set the time for 60 minutes. Wait while the Instant Pot cooks. (Note: It takes about 5 to 10 minutes for the pot to “preheat” and come up to pressure before it starts cooking. During cooking, avoid touching the metal part of the lid.)
  4. Quick release: Vent the remaining steam from the Instant Pot by moving the pressure release handle to “Venting”, covering your hand with a towel or hot pad. Never put your hands or face near the vent when releasing steam. Open the pressure cooker lid.
  5. Melt the butter in large saucepan or skillet. Add the cooked beans and their liquid. Cook for 5 minutes until they thicken, stirring occasionally. Then mash with a wooden spoon or potato masher until the desired texture is reached. Remove from the heat and serve.

You can read Full Here: https://www.acouplecooks.com/instant-pot-refried-beans/

Vegetarian Tortellini Soup

The definition of cozy in a bowl, this tortellini soup is easy to put together and its hearty flavor pleases everyone at the table!

Tortellini soup

Ready for the coziest, heartiest soup to hit your bowl? This recipe is not one Alex and I invented, though we wish we did! It comes from a new cookbook of our friends at Green Kitchen Stories, David and Luise. They’ve written their fourth cookbook called Little Green Kitchen, a book of simple vegetarian family recipes. And if this vegetarian tortellini soup is any indication, this book is packed with the most delicious, creative and colorful recipes you’ll find. Keep reading for the recipe, and more about the book!

Related: Ribollita (Tuscan Vegetable Stew) | Creamy Vegan Tomato Soup

Little Green Kitchen cookbok

About the book: Little Green Kitchen

We’ve been major fans of David and Luise’s work for years, so we’re elated to see this newest book of theirs! Little Green Kitchen is a book of vegetarian recipes for families, simple enough for kiddos but tasty enough for adults. (Really, when Alex tasted this tortellini soup, he was like “I never had anything like this as a kid!”)

David and Luise have three kiddos and live in Sweden. Though you wouldn’t guess it from their seriously drop dead gorgeous website and Instagram feed, like most families, they still struggle to get healthy and delicious meals on the table every night. So they wrote this sweet book! It’s not just for kids, but there are hints throughout where kids can get involved.

“We try to have a positive and relaxed approach to healthy food and we truly believe that by eating well we can all feel better”, David says in the opening. When you take a look at the book, you can tell right away: for them, eating is all about beauty, color, and fun! This book is so visual that you’ve absolutely got to pick up a copy so you can see what we’re talking about. It’s a gorgeous compilation and perfect for gifts.

Side note: We were able to meet up with David for an evening in Barcelona last year and he is an incredibly lovely person. We noshed on tapas together and he let Larson put stickers on him and ride his scooter through the streets (scroll down here for a sweet photo).

Get the book! Little Green Kitchen by David Frenkiel and Luise Vindahl

Tortellini soup

How to make vegetarian tortellini soup

So, this vegetarian tortellini soup: how to describe the flavor? It savory and hearty, with a lightly sweet depth that makes you want the bowl to be never-ending. The trick? Sauteing the onion with tomato paste and paprika before adding the rest of the ingredients gives just the right complexity to the broth. And a bit of carrot and celery add texture and crunch. Basil leaves are added right after the tortellini cooks, which meld into the beautiful velvety broth. Add a bit of Parmesan cheese and it’s a little bit of heaven.

How to make this easy tortellini soup? Here’s the main steps:

  1. Saute diced onion with tomato paste. Saute for about 5 minutes until the onion is softened. Adding tomato paste to the minced onion adds body to the flavor.
  2. Add diced carrots and celery. Saute for about 5 more minutes.
  3. Stir in tomatoes and broth. Bring to a boil, then simmer for about 15 minutes until the veggies are soft. Add your salt & pepper at this point, too.
  4. Add the fresh tortellini, then stir in the basil. Fresh tortellini cooks up in just 2 minutes, so this step is done in a breeze. Once they’re finished, stir in the basil leaves.
  5. Serve! Garnish with Parmesan cheese shavings and serve warm.

In the book Little Green Kitchen, they also mention that kids can help with this process as well! The best places to let kids take over? They can dice the carrots and celery with a kid-safe knife. Then they can pour in the broth, and do the final garnish with Parmesan cheese. (If we know anything from our toddler, it’s that kids love to garnish.)

PS Growing your own fresh basil is a breeze! See our post How to grow fresh herbs.

Related: Best Basil Recipes | Best Healthy Dinner Recipes

How to make tortellini soup

What is tortellini?

So what is tortellini anyway? Tortellini is a pasta shaped in a ring, filled with cheese, meat or vegetable fillings. Usually tortellini is sold in the grocery store fresh or frozen. However, there are some brands that offer dried tortellini as well. Fresh pasta cooks much faster than dried, so fresh tortellini like the one used in this soup will cook up in just a few minutes.

What to make with tortellini

What to make with tortellini? Well, of course our top pick is this tortellini soup! But if you’re looking for other options, here are a few more:

  • Tuscan Tortellini Skillet
  • Tortellini with Porcini Mushroom Sauce
  • Tortellini Minestrone
What is tortellini

Looking for more Italian vegetarian recipes?

Outside of this tortellini soup, here are a few more Italian vegetarian recipes we love:

  • Tomato Basil Pasta
  • Stracciatella Soup Recipe
  • Incredible Chopped Salad
  • Pesto Pasta with Tomatoes (or Vegan Pasta)
  • Easy Tomato Basil Soup
  • Italian Pizza with Pesto
  • Homemade Italian Dressing
  • Simple Calzone Recipe
  • Tomato Basil Gnocchi Soup
  • The Best Margherita Pizza
  • Italian Vegan Pasta Salad
  • Easy Pizza Sauce Recipe
  • Tomato & Grilled Eggplant Stacked Sandwich
  • Creamy Pasta Marinara
  • Kalamata Olive Spread
  • Easy Pasta Puttanesca Recipe

This tortellini soup recipe is…

Vegetarian. For gluten-free, look for gluten-free tortellini. (An online search can find anything these days!)

Vegetarian Tortellini Soup


1 Star2 Stars3 Stars4 Stars5 Stars (13 votes, average: 4.46 out of 5)


  • Prep Time: 5 minutes
  • Cook Time: 30 minutes
  • Yield: 3 to 4 servings 1x
Print Recipe
Pin Recipe

Description

The definition of cozy in a bowl, this tortellini soup is easy to put together and its hearty flavor pleases everyone at the table!


Scale

Ingredients

  • 2 tablespoons olive oil
  • 1 onion
  • 2 garlic cloves
  • 2 tablespoons tomato paste
  • 1 teaspoon paprika
  • 2 carrots
  • 2 celery stalks
  • 14-ounce can crushed fire roasted tomatoes
  • 1 quart vegetable broth
  • 1/2 teaspoon kosher salt
  • Freshly ground black pepper
  • 9 ounces good-quality fresh tortellini
  • 1 handful basil leaves
  • Grated Parmesan cheese, for garnish

Instructions

  1. Mince the garlic. Dice the onion. Peel the carrot; chop the carrot and celery into bite-sized pieces.
  2. Heat the olive oil in a large saucepan or Dutch oven and saute the onion and garlic with the tomato paste and paprika over medium-low heat for 5 minutes, or until the onion begins to soften.
  3. Add the carrots and celery and saute for another 5 minutes, or until the onion has softened.
  4. Add the tomatoes and vegetable broth to the pan with the kosher salt and several grinds of black pepper and bring to a boil. Reduce the heat and simmer with the lid ajar for 15 minutes, or until the vegetables are cooked.
  5. Add the tortellini to the pan and cook according to the package instructions, before stirring in the basil leaves.
  6. Serve hot topped with a sprinkling of Parmesan cheese and a drizzle of oil. (We had fresh thyme on hand, so we garnished with that as well!)

You can read Full Here: https://www.acouplecooks.com/tortellini-soup-with-basil/

Homemade Cheese Pizza

Why order out when you can make a stellar cheese pizza at home? This one is like your favorite delivery pizza, but infinitely tastier.

Cheese pizza

There’s nothing we love more than helping you make the best homemade pizza ever. We’ve got tons of pizza topping ideas from classic Margherita pizza to taco pizza, But there’s something so satisfying about a good old cheese pizza. Here’s your favorite delivery cheese pizza, but exactly 1 million times better. The sauce is extra tomato-y, the cheese is extra cheesy, and the crust is perfectly chewy. Want to know our secrets?

Homemade cheese pizza

How to make the best cheese pizza

This cheese pizza tastes just like what you’d expect from your classic pie, but infinitely better. It’s sophisticated enough for adults, but loved by all kids. We’ve tested on multiple kids in our lives, and they’re 100% in love with this cheese pizza. Here’s what makes this cheese pizza better than your normal delivery pizza:

  • 5-minute pizza sauce. Have you made our classic easy pizza sauce? It’s a fan favorite recipe and you’ll be amazed at home much flavor it has! Whiz up canned fire roasted tomatoes with garlic, olive oil, and oregano in a blender.
  • Both shredded and fresh mozzarella. What’s on the cheesiest of cheese pizzas? Shredded mozzarella and fresh mozzarella! The fresh cheese makes it seriously gooey, and the shredded is the glue that sticks it all together.
  • The best pizza dough. This pizza dough recipe is the best on the internet (we think!). Alex and I perfected it after over 10 years of researching tricks from artisan pizza makers. Keep reading for more on how to make it…
Classic cheese pizza

Pizza making tools

To make a great cheese pizza, it’s helpful to have a few pizza making tools handy! These two tools have been indispensable in our homemade pizza making game. Here’s what Alex and I recommend:

  • Pizza stone: A pizza stone is what makes Italian pizza crust crispy on the outside and soft on the inside. Here’s the best pizza stone we’ve found, and a bit more on pizza stone care.
  • Pizza peel: What’s a pizza peel? It’s a paddle used to slide the pizza onto the hot pizza stone in the oven. We recommend this Standard pizza peel or this Conveyor pizza peel.
Cheese pizza

Use either of these pizza dough variations

For the pizza dough for this cheese pizza, here are a few dough recipe options:

  • Best Pizza Dough This is our standard pizza dough that we’ve used for years! We make it using stand mixer, but you can also knead it by hand.
  • Easy Thin Crust is similar but makes a thinner dough that you roll out — it would also work well here!

The easiest way to learn how to make pizza dough? By watching someone do it! While we can’t come to your kitchen, here’s the next best option: a video! This step-by-step video shows Alex making pizza dough, from kneading to shaping. It’s so helpful, and takes less than 2 minutes to watch. We highly recommend watching this before you start!

What to serve with cheese pizza?

Alex and I served this classic homemade cheese pizza for our nephews and son Larson for a cousins sleepover. They absolutely loved it! We served it with carrot sticks and the healthy ranch dressing below (and Strawberry Daiquiris for the adults!). Here are a few great sides to go with pizza:

  • Easy Arugula Salad The simplest salad you’ll ever make! It’s fool-proof: you don’t even need to make dressing.
  • Spinach Apple Salad stars a creamy balsamic dressing, glazed pecans, and apple and pear slices. No one will believe it took minutes to put together.
  • Healthy Ranch Dressing Serve it with veggie sticks! This homemade ranch is seriously tasty and takes just 5 minutes.
  • Favorite Chopped Salad Homemade Italian dressing, crisp veggies and Parmesan cheese combine into one extraordinary salad.
Homemade cheese pizza

This cheese pizza recipe is…

Vegetarian.

Homemade Cheese Pizza


1 Star2 Stars3 Stars4 Stars5 Stars (24 votes, average: 4.50 out of 5)


  • Prep Time: 1 hour
  • Cook Time: 7 minutes
  • Yield: 1 pizza (8 slices) 1x
Print Recipe
Pin Recipe

Description

Why order out when you can make a stellar cheese pizza at home? This one is like your favorite delivery pizza, but infinitely tastier.


Scale

Ingredients

  • 1 ball Best Pizza Dough (or Food Processor Dough or Thin Crust Dough)
  • 1/3 cup Easy Pizza Sauce
  • 4 ounces fresh mozzarella cheese
  • 4 ounces (1 cup) shredded mozzarella cheese
  • 1/4 teaspoon garlic powder
  • 1 teaspoon dried oregano
  • Kosher salt
  • Semolina flour or cornmeal, for dusting the pizza peel

Instructions

  1. Make the pizza dough: Follow the Best Pizza Dough recipe to prepare the dough. (This takes about 15 minutes to make and 45 minutes to rest.)
  2. Place a pizza stone in the oven and preheat to 500°F. OR preheat your pizza oven (here’s the pizza oven we use).
  3. Make the pizza sauce: Make the Easy Pizza Sauce.
  4. Prepare the toppings: Slice or tear the fresh mozzarella into small pieces.
  5. Bake the pizza: When the oven is ready, dust a pizza peel with cornmeal or semolina flour. (If you don’t have a pizza peel, you can use a rimless baking sheet or the back of a rimmed baking sheet. But a pizza peel is well worth the investment!) Stretch the dough into a circle; see How to Stretch Pizza Dough for instructions. Then gently place the dough onto the pizza peel.
  6. Spread the pizza sauce over the dough using the back of a spoon to create a thin layer. Add the pieces of fresh mozzarella cheese evenly across the dough, then top with the shredded mozzarella cheese. Sprinkle evenly with the garlic powder, dried oregano, and a few pinches of kosher salt.
  7. Use the pizza peel to carefully transfer the pizza onto the preheated pizza stone. Bake the pizza until the cheese and crust are nicely browned, about 5 to 7 minutes in the oven (or 1 minute in a pizza oven). Slice into pieces and serve immediately.

You can read Full Here: https://www.acouplecooks.com/homemade-cheese-pizza/